
Creating Your First Lot Map
Upload a parking lot photo, draw custom named zones, color-code areas, and share it with your team.
Navigate to Maps
Tap Maps in the main nav (it's in the More menu on mobile). You'll see your existing maps or an empty state if this is your first one.
Create a new map and upload a photo
Click + Add Map. Give your map a name (e.g. "Main Lot" or "Back Lot") and upload a top-down photo of your parking lot. Use a drone photo or Google Maps screenshot for the best result.
Click to upload lot photo
PNG, JPG up to 10MB. Aerial / top-down view works best.
Draw zones by clicking on the map
Once your photo is uploaded, click the Draw Zone button. Click on the map image to place polygon points around a parking area. Click "Finish Zone" to close the shape. You'll be prompted to name the zone and pick a color.
Completed map with zones
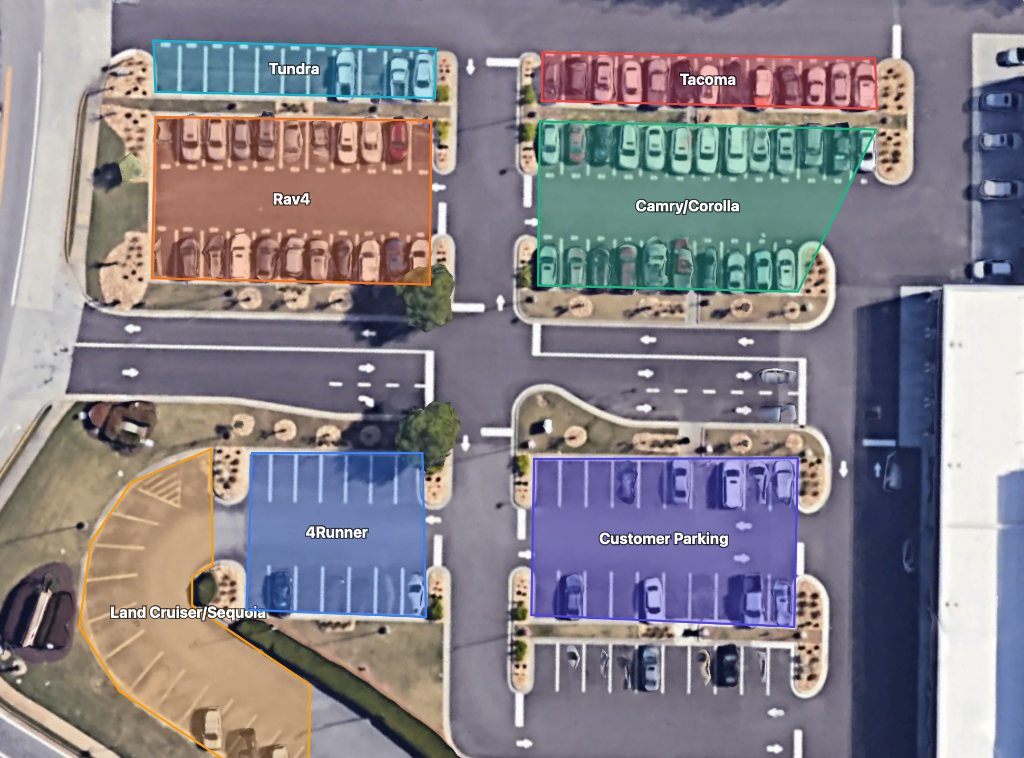
Name and color-code your zones
Each zone gets a name and a hex color. Use the zone editor to add, rename, or remove zones without redrawing. Try the zone editor below:
Zone editor — interactive
Add a zone
Pick a color
Share with your team
The map is instantly visible to all staff under the Maps page. Salespeople can view it on their phones to quickly find a vehicle or direct a customer to the right section. You can add multiple maps for different lots.